
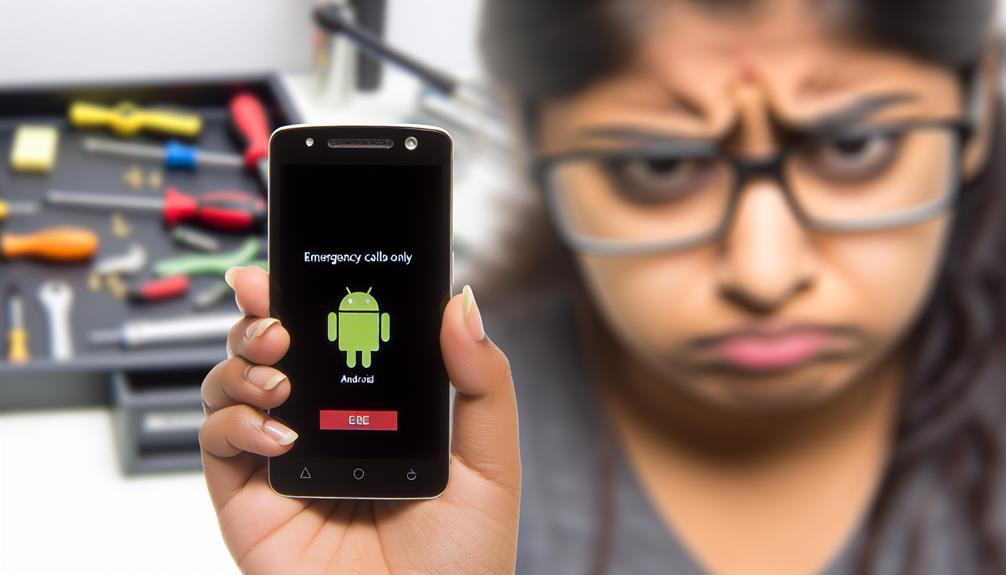
If your Android phone says "Emergency Calls Only," start by checking Airplane Mode; make certain it's turned off. Restart your phone to refresh the system, and verify your network signal strength in settings. Reinsert the SIM card carefully, checking for damage. Next, update your carrier settings and software to eliminate potential bugs. Clear the cache of the Phone app for smoother operation. If issues persist, consider a factory reset, but back up your data first. Finally, if all else fails, contact your service provider for assistance, as they might provide additional insights on connectivity issues. Further solutions await you.
Key Takeaways
- Disable Airplane Mode to restore network connectivity and toggle it on and off to refresh connections.
- Check signal strength; a reading above -70 dBm is ideal for stable connectivity.
- Reinsert the SIM card, ensuring it's clean and properly aligned in the tray.
- Restart your phone to refresh the system and resolve minor glitches impacting connectivity.
- Contact your service provider to confirm plan activation and seek technical support if issues persist.
Check Airplane Mode Settings

When troubleshooting an Android phone that's stuck on "Emergency Calls Only," the first step is to check your Airplane Mode settings. Often, this mode can inadvertently be activated, disrupting your network connection. To access these settings, swipe down from the top of your screen to open the Quick Settings panel. Look for the Airplane Mode icon; if it's highlighted, tap it to disable it. Understanding how to navigate the technological landscape can be essential, especially if you're considering roles in remote customer service careers which often require effective communication skills and problem-solving abilities.
Once you've turned off Airplane Mode, it's essential to conduct a thorough network settings review. Go to your phone's Settings app, then navigate to 'Network & Internet' or 'Connections,' depending on your device. Check if your mobile data is enabled, as this can also affect your connectivity.
If you're still having issues, consider toggling Airplane Mode back on and off again to reset your network connections. This simple Airplane mode troubleshooting can often resolve temporary glitches.
Restart Your Android Phone
Restarting your Android phone can often resolve the "Emergency Calls Only" issue. This process, known as power cycling, refreshes your device's system and can fix minor glitches affecting your network connection. Just like how transformative learning techniques enhance student engagement, a simple restart can greatly improve your device's performance. It's one of the quickest fixes you can try before diving into more complex solutions.
Here's how to do it:
- Press and Hold the Power Button: Locate the power button on your device and hold it down until the power menu appears.
- Select Restart: Tap on the "Restart" option. If your device doesn't have this option, select "Power Off" instead.
- Wait and Power Back On: Allow your phone to fully shut down. Wait a few seconds, then press the power button again to turn it back on.
After your phone restarts, check if the issue persists. This simple step can often restore your connection and eliminate the "Emergency Calls Only" message. If the problem continues, don't worry; there are other steps to explore. Remember, it's all part of the troubleshooting process, and you're not alone in facing these common challenges.
Verify Network Signal Strength

After a restart, it's important to check your network signal strength, as weak or unstable signals can lead to the "Emergency Calls Only" status. This is especially important in light of recent market trends which indicate that connectivity issues can greatly impact consumer behavior. Begin by looking at the signal bars on your phone. If you see only one or no bars, it indicates a poor connection to your network provider. This is a key step in network troubleshooting.
You can also use your phone's settings to get more detailed information. Navigate to Settings > Network & Internet > Mobile Network. Here, you'll find options to view signal strength in decibels (dBm). A signal strength of -70 dBm or higher is generally considered good, while anything below -100 dBm is likely problematic.
If you're in an area with consistently weak reception, consider using signal boosters. These devices amplify your cellular signal, improving performance and connectivity. Make sure to check if your carrier supports such devices; they can be a game-changer in maintaining a reliable connection. Remember, ensuring a strong network signal is essential for avoiding the frustrating "Emergency Calls Only" issue.
Reinsert SIM Card
A simple yet effective method to resolve the "Emergency Calls Only" issue is to reinsert your SIM card. This basic step often helps with SIM card troubleshooting, ensuring that your device recognizes the card correctly. Additionally, ensuring that your phone's settings are optimized for network connectivity can greatly enhance overall performance, much like how enhancing practice efficiency boosts dental practices. Here's how to do it:
- Power Off Your Phone: Always turn off your device before removing the SIM card to prevent any potential data loss or damage.
- Remove the SIM Card Tray: Using a SIM eject tool or a small pin, gently push into the SIM card slot to extract the tray.
- Check for Damage: Inspect the SIM card for scratches or dirt. Clean it if necessary, then carefully place it back into the tray, ensuring proper alignment for SIM card compatibility.
After reinserting the SIM card, power your phone back on. This process can often restore your mobile network and eliminate the "Emergency Calls Only" status. If the problem persists, you may want to reflect on further options, but don't underestimate the impact of a simple reinsert. It's an essential first step in addressing network issues.
Update Carrier Settings

Reinserting your SIM card can often resolve the "Emergency Calls Only" issue, but if that doesn't work, it's time to contemplate updating your carrier settings. This step is essential since outdated or incorrect carrier settings can disrupt your phone's connectivity. Furthermore, just as Tesla's innovations have prompted shifts in energy demand, verifying your phone's settings are up-to-date can help maintain peak connectivity in a rapidly evolving mobile environment a shift in connectivity trends.
To update your carrier settings, navigate to your device's settings menu. Look for "About Phone" and then select "Carrier Settings." If an update is available, follow the prompts to install it. This process guarantees your phone maintains carrier compatibility, allowing it to communicate effectively with your network.
Additionally, check your APN settings, as these can also affect your connectivity. Access the "Mobile Networks" section in your settings, then find "Access Point Names." Confirm that the APN settings match those provided by your carrier. If they're incorrect, adjust them accordingly or reset them to default.
Updating carrier settings and verifying APN configurations can greatly improve your phone's performance and connectivity. If you've tried these solutions and still face issues, it might be time to explore further into network settings or contact your carrier for assistance.
Reset Network Settings
If you're still faced with the "Emergency Calls Only" issue, resetting your network settings can be an effective next step. This action helps eliminate any lingering signal interference and can greatly aid in network troubleshooting. Here's how to do it:
- Access Settings: Open your phone's settings app.
- Find Reset Options: Scroll down to "System" or "General Management," then tap on "Reset."
- Select Network Settings Reset: Choose "Reset Network Settings" and confirm the action.
Resetting your network settings will erase saved Wi-Fi networks, Bluetooth pairings, and mobile data settings, so make sure you have that information handy. Once you've completed this process, your device will reboot, and you'll have a fresh start on your network connections.
This step can often resolve issues related to connectivity that may have been caused by previous configurations or signal interference. If the problem persists after resetting, consider exploring other troubleshooting options or reaching out for further support. Remember, you're not alone in this; many people face similar challenges, and solutions are available.
Check for Software Updates

To resolve the issue of your Android phone being stuck on emergency calls only, it's essential to check for software updates. Start by accessing the software update settings in your device's menu. Installing any available updates and restarting your phone can often restore normal functionality.
Accessing Software Update Settings
Checking for software updates is an important step in resolving the "Emergency Calls Only" issue on your Android phone. Ensuring your device runs the latest software version can help eliminate bugs that might be causing connectivity problems.
To access the software update settings, follow these steps:
- Open Settings: Locate the gear icon on your home screen or app drawer and tap it.
- Scroll to System: Navigate down and select 'System' or 'About Phone,' depending on your device.
- Check for Updates: Tap on 'Software Update' or 'System Update' to see if an update is available.
Regularly checking for updates is vital for maintaining ideal update frequency, as manufacturers often release patches to improve performance and fix known issues. If updates are available, it's recommended to install them promptly. This proactive approach not only enhances your phone's functionality but also fosters a sense of community among users who prioritize keeping their devices current. By addressing the software aspect of your phone, you're taking a significant step towards resolving the connectivity issues you're experiencing.
Installing Available Updates
Once you've identified that updates are available, installing them is vital for restoring your phone's connectivity. Regularly checking for updates not only resolves bugs but also enhances performance, guaranteeing you're always connected. The update frequency plays an important role in maintaining your device's efficiency and security.
Here's a quick overview of the update benefits:
| Update Type | Benefits |
|---|---|
| Security Updates | Protects against vulnerabilities |
| Feature Updates | Introduces new functionalities |
| Performance Updates | Optimizes system speed |
| Compatibility Updates | Assures apps run smoothly |
| Stability Updates | Reduces crashes and errors |
To install the available updates, head to your software update settings and tap on "Download" or "Install." Make sure your phone is connected to Wi-Fi to avoid using mobile data unnecessarily. After the installation, your device should reboot, applying the latest changes.
Restarting After Update
When you've installed updates on your Android phone, it's essential to restart the device to confirm all changes take effect properly. Failing to do so can lead to update issues, affecting your phone performance. By restarting, you verify that the new software integrates seamlessly with your device's existing system.
Here's a quick checklist to follow after updates:
- Check for Update Issues: After restarting, verify if there are any error messages or connectivity problems. If issues persist, consider reapplying the update.
- Monitor Phone Performance: Pay attention to how your phone behaves post-update. If you notice lag or unexpected behavior, another restart may be needed.
- Confirm Features Function Properly: Test key functions like calling, texting, and internet connectivity. This helps identify any lingering problems that may arise from the update.
Clear Cache of Phone App
Clearing the cache of your Phone app can often resolve issues that lead to your Android device being stuck on "Emergency Calls Only." This process removes temporary files that may be causing conflicts or errors in the app's functionality. To start, head over to your phone settings.
Once you're in the settings, scroll down and tap on "Apps" or "Application Manager," depending on your device. Locate the Phone app in the list and select it. You'll see options for storage and app performance. Tap on "Storage," and then you should see an option to "Clear Cache." Confirm your choice, and the cached data will be removed.
After clearing the cache, restart your device to confirm the changes take effect. This simple step can greatly enhance the app performance, allowing your Phone app to operate smoothly and potentially resolve connectivity issues. If you find yourself still facing the same problem, it might be time to explore additional troubleshooting methods. Remember, keeping your app's cache clear helps maintain ideal performance and a seamless user experience.
Perform a Factory Reset
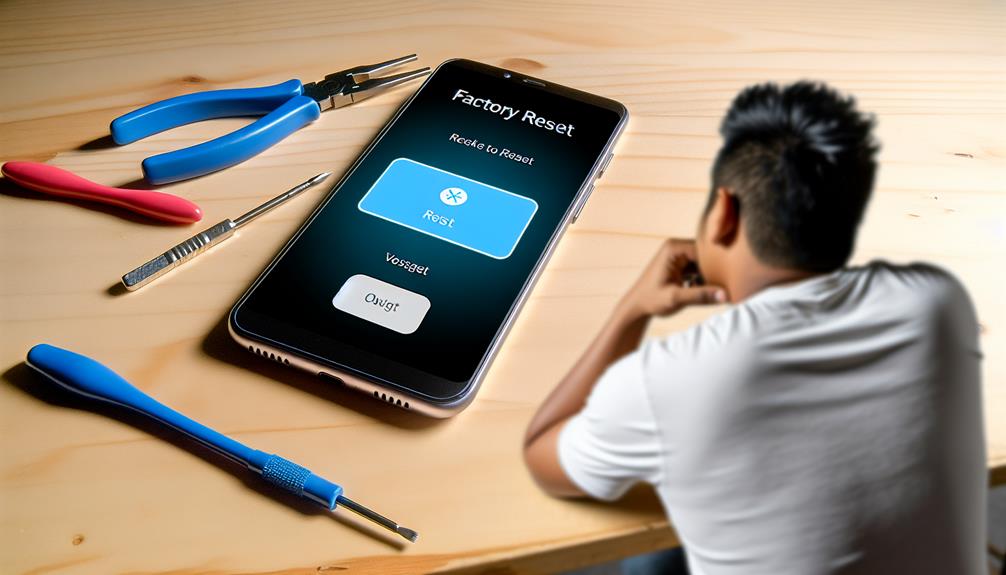
If you're still facing issues after clearing the cache, performing a factory reset may be your next step. Before you proceed, make sure to backup your data, as this process will erase everything on your device. Once you've secured your data, you can access recovery mode and confirm the factory reset to restore your phone to its original settings.
Backup Your Data
Before you proceed with a factory reset, it is crucial to backup your data to prevent loss of important information. Losing your contacts, photos, and other essential files can be a hassle, so let's make your data protection a priority. Here are a few effective backup methods:
- Google Account: Sync your contacts, calendar events, and app data with your Google account. Just go to Settings > Accounts > Google and enable sync for the items you want to back up.
- Cloud Storage: Utilize services like Google Drive or Dropbox to upload your documents and files. This way, you can access them from any device after the reset.
- Local Backup: Connect your phone to a computer and transfer important files manually. This method guarantees you have a physical copy of your data stored safely.
Following these steps will give you peace of mind, knowing your information is secure. Once you've completed the backup process, you can confidently perform the factory reset, knowing your data is safe and sound.
Access Recovery Mode
To access Recovery Mode and perform a factory reset on your Android phone, you'll need to follow a specific sequence of steps. First, power off your device completely. Then, depending on your phone model, press and hold the combination of the volume up button and the power button simultaneously until the boot menu appears. You might see options like "Start," "Recovery Mode," or "Fastboot," depending on your device.
Once you've accessed the boot menu, use the volume buttons to navigate to the "Recovery Mode" option. Select it using the power button. Your phone will then display the Android logo with an exclamation mark, indicating it's in recovery mode.
Next, again, use the volume buttons to navigate through the recovery options until you find "Wipe data/factory reset." Confirm your selection with the power button. Remember, a factory reset will erase all your data, so make sure you've backed up any vital information beforehand. After the reset, you can reboot your device, and it should start fresh, resolving the "Emergency Calls Only" issue.
Confirm Factory Reset
Once you've accessed Recovery Mode, it's time to confirm the factory reset. This step is essential for fixing your phone and restoring a better user experience, but be aware that it'll lead to data loss if you haven't backed up your important files. Here's what you need to do:
- Navigate to the "Wipe Data/Factory Reset" option using the volume buttons.
- Confirm your selection with the power button.
- Follow any on-screen prompts to finalize the reset.
Before proceeding, remember the backup significance. If you've already backed up your data, you can proceed confidently, knowing you won't lose anything critical. If not, consider using cloud services or an external storage solution in the future to safeguard your information.
Once the factory reset is confirmed, your phone will begin the process. After it's completed, select the "Reboot System Now" option. Your device should restart, allowing you to set it up fresh. This is one of the most effective troubleshooting strategies for resolving the "Emergency Calls Only" issue, giving your phone a new lease on life.
Contact Your Service Provider
If your Android phone is showing "Emergency Calls Only," it's important to reach out to your service provider. This issue can stem from various account problems, so contacting them can help identify the root cause. Begin by discussing your current service options; they may have insights into recent network coverage changes or service outages affecting your area.
Inquire about any billing problems or plan restrictions that might limit your connectivity. It's vital to confirm your plan is active and that you're not encountering any unexpected charges. If you've recently changed plans or services, device compatibility could also be a factor. Your provider can clarify if your phone meets the necessary requirements for their network.
Don't hesitate to ask for technical support. They often have tools to diagnose and resolve issues quickly. Share any specific error messages you've encountered, as this can expedite the troubleshooting process. Remember, staying connected is crucial, and your service provider is there to assist you in getting back online. By addressing these concerns, you'll be on your way to resolving the "Emergency Calls Only" status effectively.
Frequently Asked Questions
What Causes My Android Phone to Show "Emergency Calls Only"?
When your Android phone shows "emergency calls only," it often indicates network issues, poor signal strength, or problems with carrier settings. Software glitches can also contribute, preventing your phone from connecting properly. Check your SIM card for compatibility, as an incompatible card might cause this issue. Finally, make certain airplane mode isn't accidentally turned on, as that would block all network connections. Addressing these factors can help restore normal functionality.
Can I Use Wi-Fi Calling When Stuck on "Emergency Calls Only"?
You can't typically use Wi-Fi calling when your phone's stuck on "emergency calls only." This issue usually indicates a problem with your network settings or cellular connectivity. However, if you have Wi-Fi access, you might explore Wi-Fi alternatives for communication, like messaging apps. To regain full functionality, check your network settings, toggle airplane mode, or restart your phone. If the problem persists, consider contacting your carrier for assistance.
How Can I Check if My SIM Card Is Damaged?
To check if your SIM card's damaged, start with SIM card testing. Remove the card and inspect it for physical damage, like cracks or scratches. Try inserting it into another compatible device to see if it works there. If it doesn't, your SIM might be faulty. Also, verify your device supports your network compatibility; some SIMs won't function on certain networks. If issues persist, consider getting a replacement SIM.
Will a Factory Reset Delete My Personal Data?
Yes, a factory reset will delete your personal data, including apps, photos, and contacts. To prevent data loss, it's essential you perform a data backup beforehand. Consider using cloud services or recovery options available on your device to save important files. After backing up, you can proceed with the reset, knowing your data is secure and can be restored later. Always double-check that everything's backed up to avoid unwanted surprises.
What Should I Do if the Problem Persists After Troubleshooting?
If the problem persists after troubleshooting, consider resetting your network settings. This can often resolve persistent connectivity issues. If that doesn't help, you might want to invest in a signal booster to enhance reception in weak areas. Make sure your device's software is also up to date, as updates can fix bugs that cause connectivity problems. Don't hesitate to reach out to your carrier for additional support if needed.